Create a template with AI
Create with AI builds a reusable personalized template from a few answers: the background, text and supported layers that change for each recipient. You can also design a template in the canvas, or open the AI result there to refine it.
Template creation and recipient personalization
Section titled “Template creation and recipient personalization”AI helps create the template. Once you save it, Piksio renders that saved design with each recipient’s details. Sending an email or opening a recipient image does not ask AI to generate a new layout or background.
Standard AI background generation and successful picture edits cost 40 credits each. Multiple generated backgrounds are separate generations. Using your own photo as is uses no AI image credits. Recipient rendering has separate usage: the first 500 standard personalized images each month are free, then each new standard image uses 1 credit; an image containing a rendered map uses 2 credits or allowance units. Repeat fetches of an unchanged personalized image are free. See pricing.
Three ways to start
Section titled “Three ways to start”Click Create a personalized image (on the home screen, or in Personalized media) and pick one:
- Start from a template — a ready-made design you make your own. Ready in seconds, no credits. See Start from a template.
- Create with AI — answer the questions below. About a minute.
- Blank canvas — design it yourself in the editor.
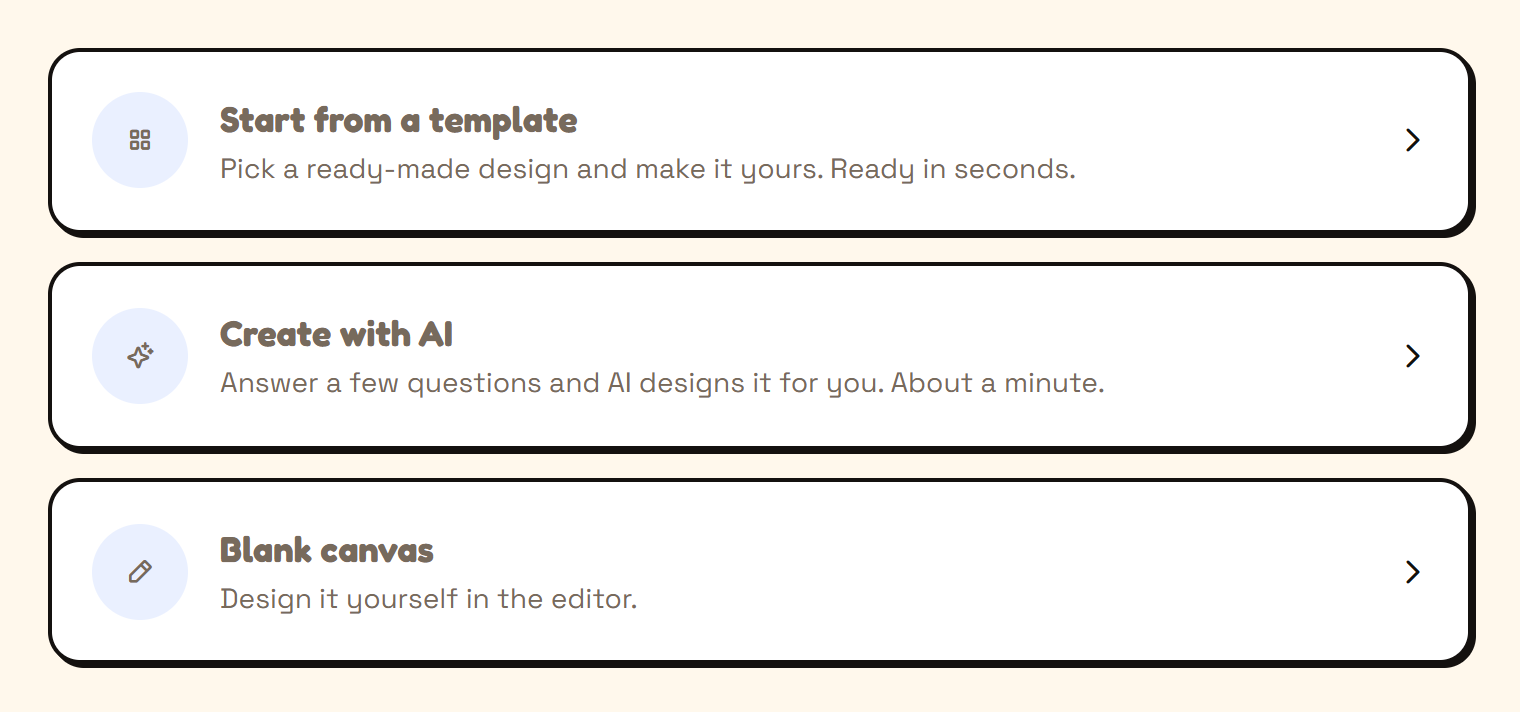
On a phone, the blank canvas isn’t offered — the editor needs a bigger screen. The other two are the whole job on their own. See On your phone.
The same questions also open from inside the editor: with nothing selected, go to Settings → Generate with AI → Create with AI. It opens sized to your canvas, and the result comes back with Use in canvas. Your current design stays untouched until you choose it.
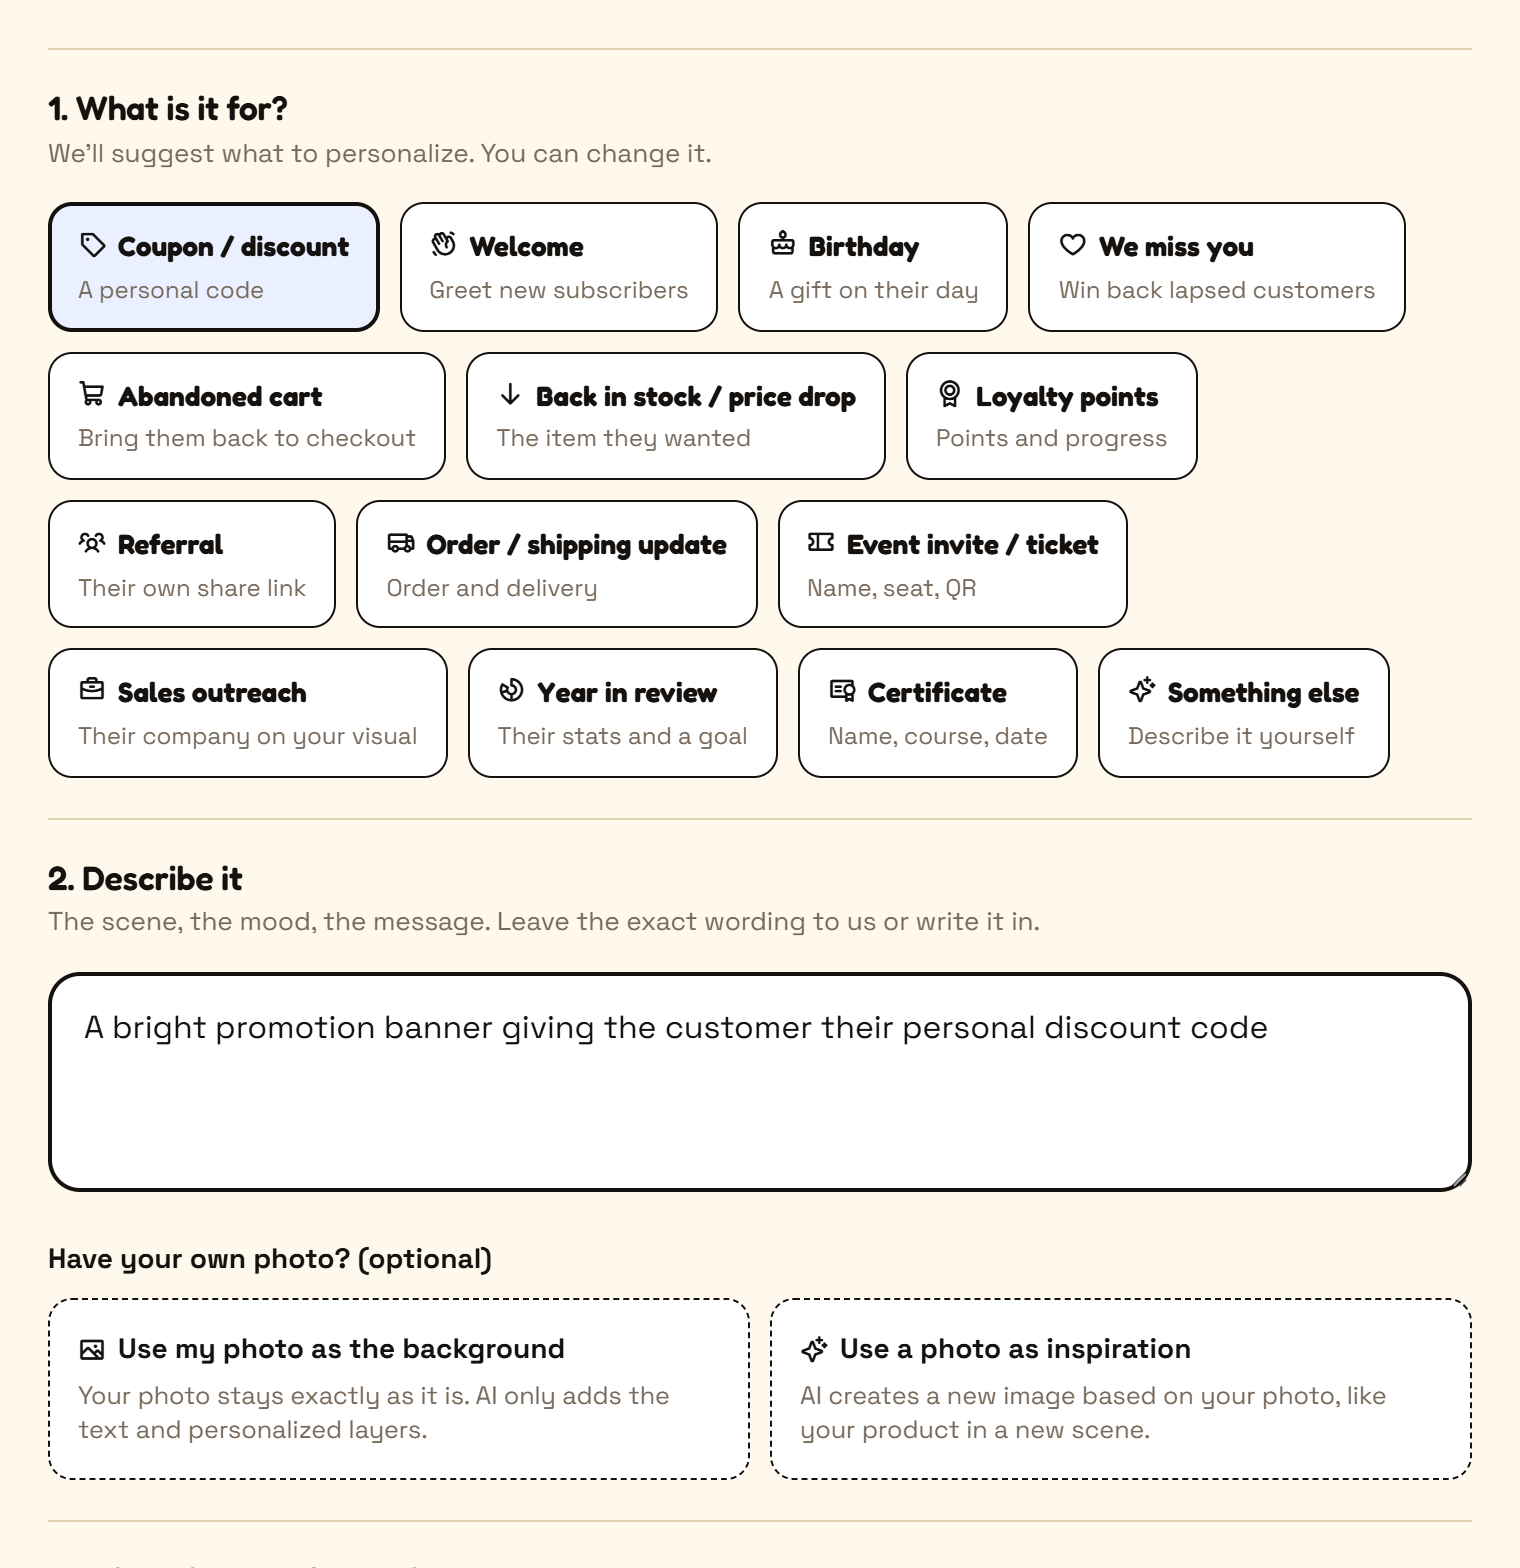
1. What is it for?
Section titled “1. What is it for?”Pick what you’re making: coupon, welcome, birthday, we miss you, abandoned cart, back in stock, loyalty points, referral, order update, event ticket, sales outreach, year in review, certificate, or Something else.
The choice is a shortcut, not a cage. It pre-picks the fields that use case normally needs, a sensible size, and an example description you can rewrite.
2. Describe it
Section titled “2. Describe it”Write the scene, the mood and the message, for example “A summer sale banner with a beach at sunset, greeting the customer by name”. You can leave the exact wording to Piksio or write the words you want.
Have your own photo? (optional) gives you two choices:
- Use my photo as the background — your photo stays exactly as it is. AI only writes the text and adds the personalized layers on top. This uses no AI artwork credits. Rendering recipient images is billed separately. If the photo is a different shape from the size you picked, Piksio offers to Match my photo’s shape instead of cropping it.
- Use a photo as inspiration — AI creates a new picture based on yours, for example your product in the scene you describe.
You can switch between the two at any time, or remove the photo.
3. What changes for each person?
Section titled “3. What changes for each person?”Tap the chips for everything that should be personal: First name, Company name, Discount code, Company logo, Profile photo, QR code, Map of their address, Progress bar, Donut (a %). Add your own with the Another field box, for example city.
Photos, QR codes, maps and logos are simply left out for anyone without that data. Text fields get an If we don’t know it, show: box instead — your fallback. Leave it empty to leave the word out. See Fallbacks and blanks.
A chart field adds two more questions: the Title shown on the chart, and the Data field in your list that holds each person’s number from 0 to 100. Charts can animate, filling up to each person’s value when the email opens, as an animated GIF:
- Length — 1, 1.6 or 2.5 seconds.
- Outlook-safe — Outlook on Windows only shows a GIF’s first frame, so this starts with the finished value for a split second. Leave it on unless you have a reason not to.
Turn the animation off and the chart renders as a still PNG showing the final value.
Put it on the product
Section titled “Put it on the product”Text and logo fields can be printed on a product in the picture rather than sitting flat on top of it: Wrapped around it for bottles, cups, mugs and cans, or Following the surface for shirts, totes, bags and paper. AI creates a plain product background for the template. Saved surface effects then apply each recipient’s text or logo when their image is rendered, without generating new AI artwork.
Short text like a name or a code works best, these designs always render as a still image, and you can fine-tune the fit in the editor’s Wrap effects.
4. Where will it go?
Section titled “4. Where will it go?”The use case picks a size for you. Change shows the rest: email header (1200 × 600), email square (1200 × 1200), email banner (1200 × 400), social square, social portrait, story, link preview, or Custom size in pixels.
More options
Section titled “More options”- Backgrounds. Add up to five versions of the background and let each recipient’s data choose: give the extra ones a code like
viporparis, and name the data field that carries it. Each background can be AI from your description, your photo as is, or AI inspired by a photo. Anyone without a code sees the default. With a single background, Let my data swap the background adds the same field so a full image link (https://…) in your data can replace the background for one person. - Style extras. Badge behind the code (a pill in your brand colour), Panel behind the text (a soft rounded panel so text reads well on busy pictures), and Label on the product. Each one is a real layer you can change later in the editor.
- Image or layer. Use the image as the canvas background is the recommended default and is required for swapping backgrounds per person. Turn it off and the picture becomes a normal layer you can move, crop or delete in the editor.
5. Brand
Section titled “5. Brand”If you have a brand, Piksio uses its colours, fonts and tone of voice. With no brand it picks a clean style. Add one from the home screen to make every image on-brand: Start from your brand.
Create template
Section titled “Create template”The footer shows what it will cost before you spend anything — the credits for generating the template’s AI artwork, or No image credits if you’re using your own photo as is. That label refers to AI artwork creation; recipient rendering is billed separately. If you picked the map field it also warns that each image will then cost 2 credits per person instead of 1. Then click Create template.
It takes about a minute: Piksio writes the layout and the text, generates the picture, and places your text and personalized layers. Keep the screen open while it works. If it fails, no credits are used and you come straight back to your answers.
Fine-tune the result
Section titled “Fine-tune the result”The result screen shows a real render, not a mock-up.
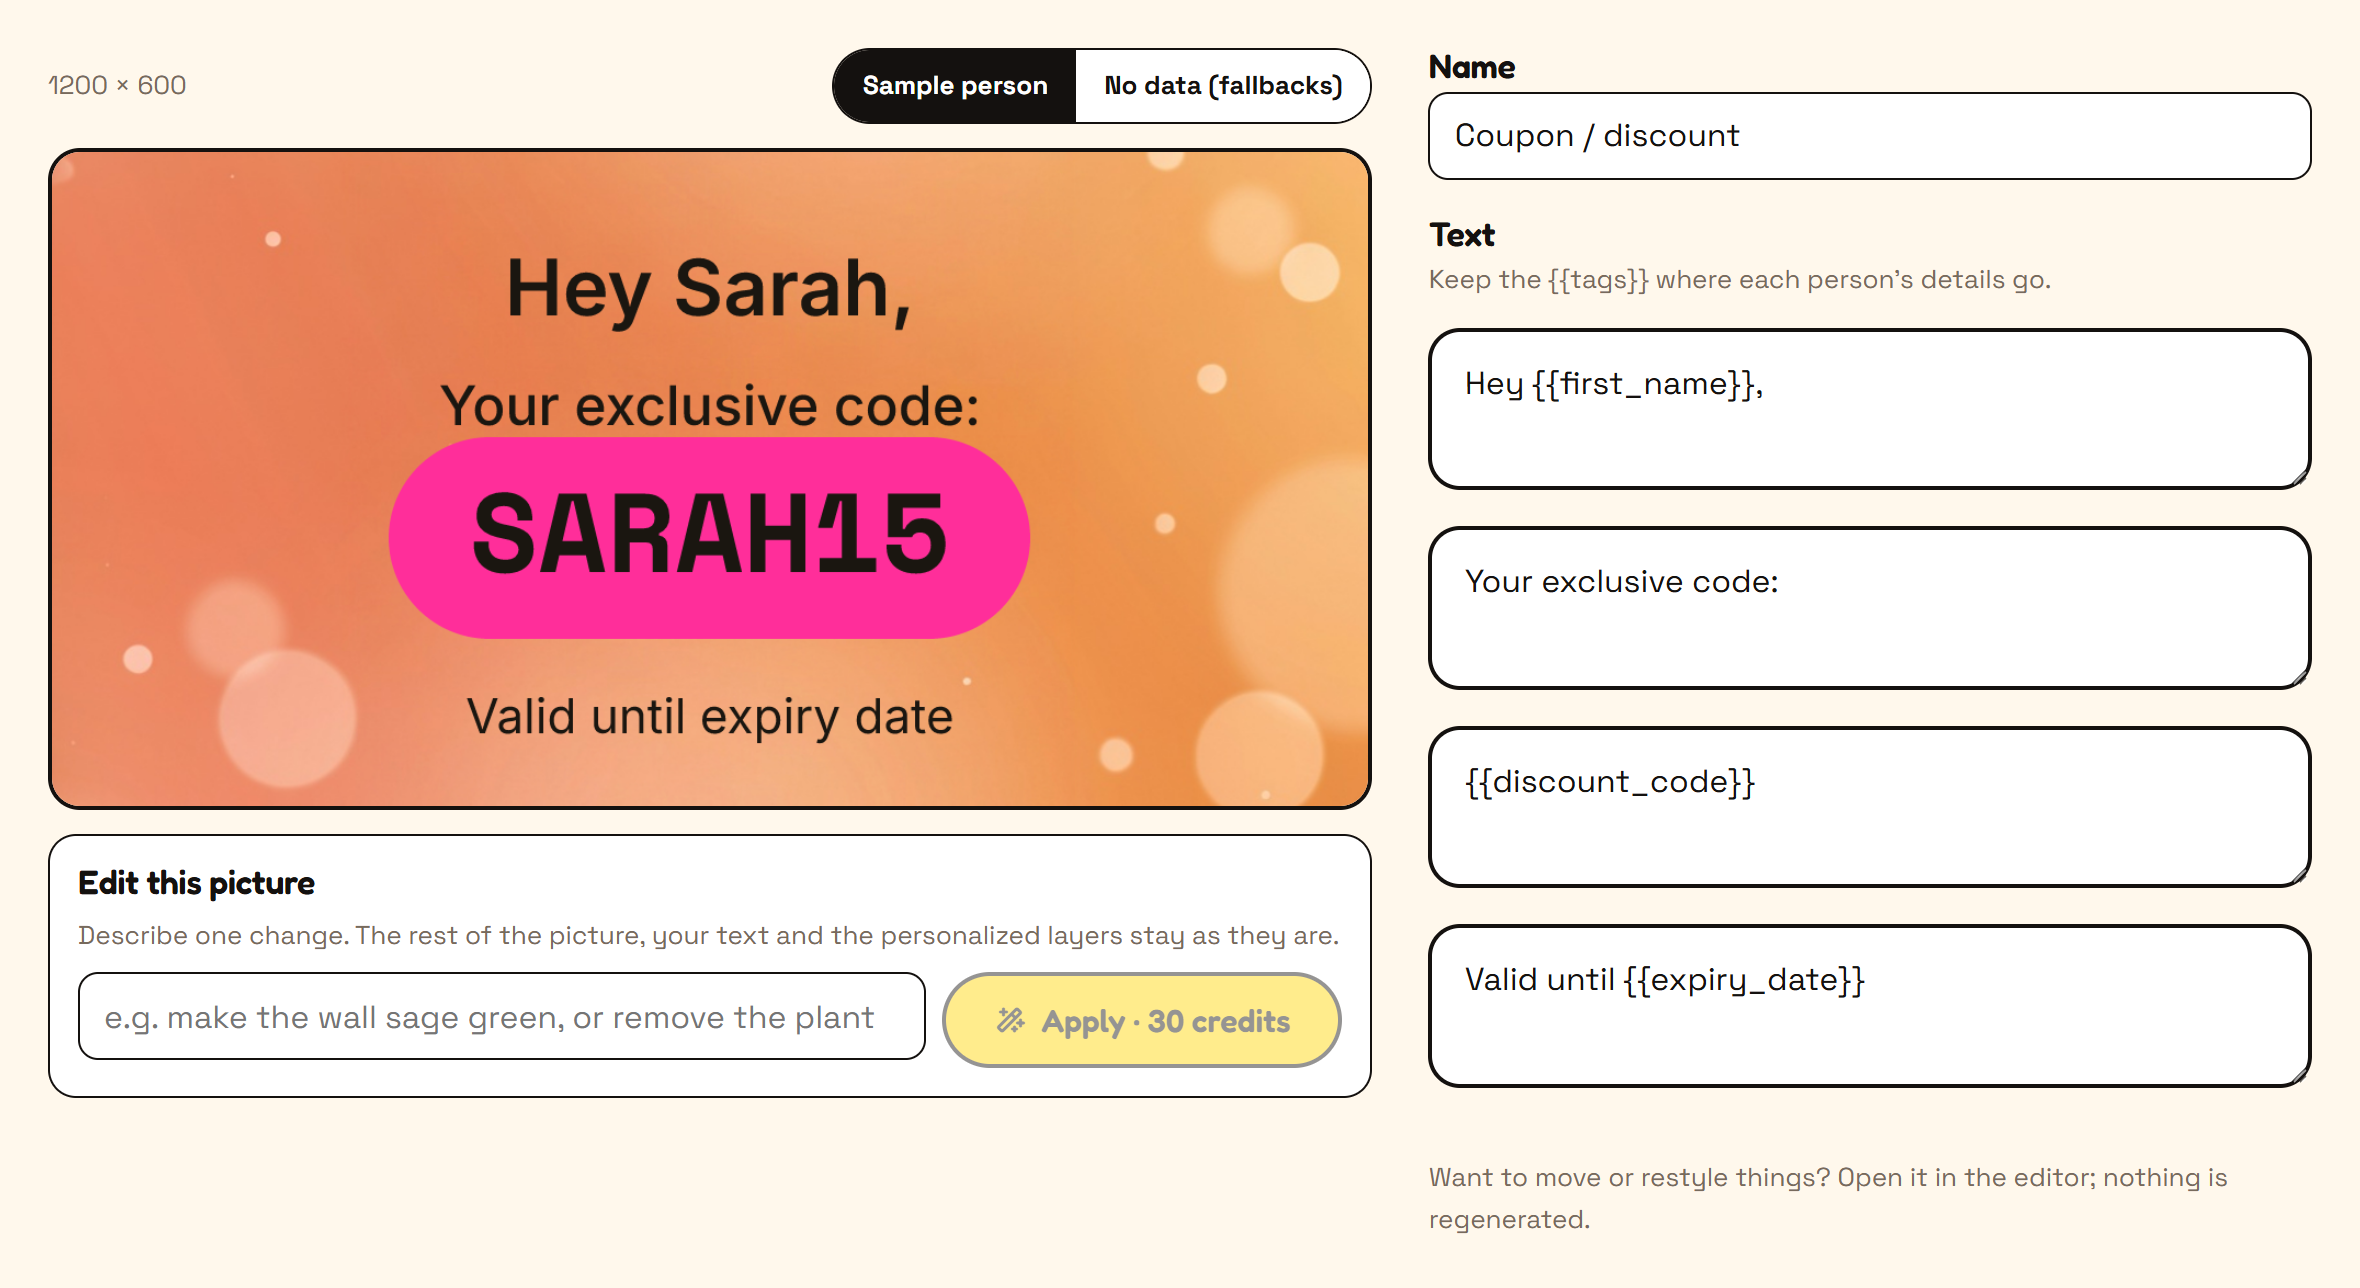
- Sample person / No data (fallbacks) switches the preview between a filled-in example and exactly what a recipient with no data receives.
- Text lets you rewrite any line the AI wrote. Keep the
{{tags}}where each person’s details go. - When a detail is missing holds the fallback for each text field. Leave one empty to hide that word.
- Edit this picture changes one thing in the picture itself — “make the wall sage green”, “remove the plant”. Your text and personalized layers stay exactly as they are. Each edit costs the credits shown on the Apply button and takes about ten seconds; Undo and the earlier versions beside it are free to go back to.
- Regenerate template creates another template from the same answers. Its AI artwork has the creation cost shown; it is separate from recipient rendering. Start over returns to the questions.
- Open in editor hands the design to the editor exactly as it is — nothing is regenerated — when you want to move or restyle things.
Save and use it
Section titled “Save and use it”Give it a Name, then click Save & get link. The Use in email dialog opens on the spot, so you can copy the link for your platform and test it without going anywhere else.
The link never changes: edit the image and save again, and every email already sent shows the new version. See Image links.